So where were we ah yes this little beauty...
I just love this effect, it is so easy and so versatile! All you need is Distress Oxides, spritzer/water, a paint brush (and a stamp or two!).
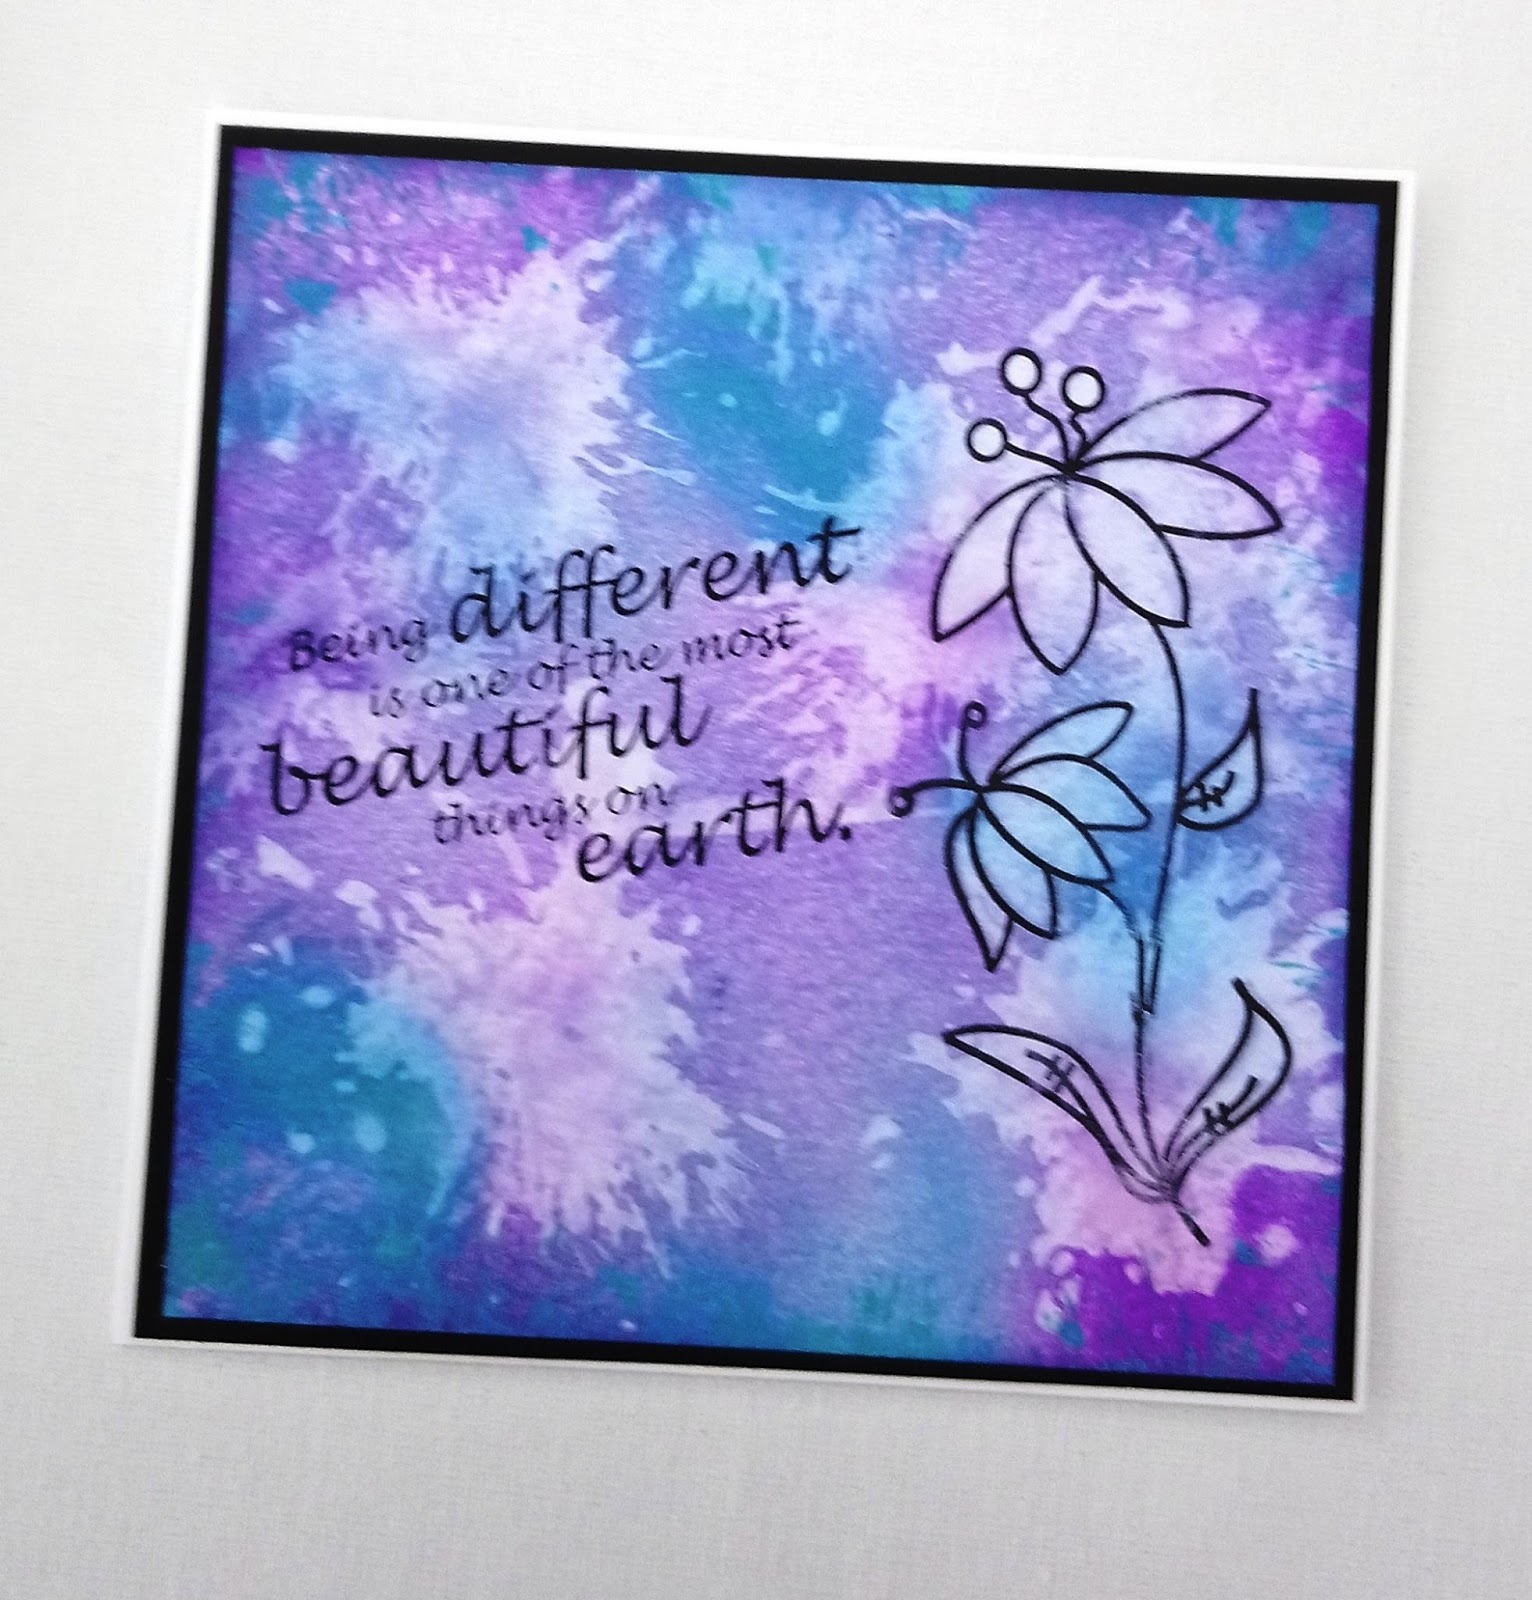
So here goes, start with a plain piece of white card and trim it so it is 2 cm smaller than your finished card. Then start to add your colours, I started with the palest colour first, salty ocean then seedless preserves and wilted violet (i think these are the colours!). I added them in random patches all over the piece of card making sure to apply very thickly.


Using your background stamp I used our Splat stamp. Spritz the stamp so it is wet but not dripping! Stamp onto your card leave in place for a couple of seconds - if you are using a clear stamping block you can see the water doing its thing - So fab!! lift the stamp off and dab your piece of card, keep doing this until you are happy with your background.
Yes you can second generation stamp with the water BUT 1) it wont remove as much ink (looks good though) and 2) remember Distress Oxides like to contaminate (they are messy monkeys!) so you will transfer some of the colour you have just removed.

Make sure your background is dry and stamp your image I used our Amazing Funky Flower using black Archival Ink.

When the flower is dry, using a paint brush and water "paint" the flower blotting it with kitchen roll until you are happy with your finished image.
Can you tell I have lost a photo - Whoops!!!
Then stamp your sentiment and mount it onto a black piece of card and then onto your base card. really simple to do but wow you can create some stunning effects, I used 3 Oxides but it works just as well using 2.
No comments:
Post a Comment