Showing posts with label Scrapbook. Show all posts

Monday, 16 July 2018

Monthly Make Monday - 'Tis the Season!

Happy Monday!

This months Monthly Make stamp set is a biggie a whopping A4 in size, which contains the fabulous new Tree POLY PLATE which is a perfect size for A5 cards.

But today, I am steering clear of cards and returning to a love of mine..... Scrapbooking! I haven't scrapped in ages but some thing about this stamp set yelled out to be scrapped, so I dug out a Festive picture and away I went.

What do you think????


The hardest part of the whole page was finding my 12 x 12 card stock! It was in a "safe place"! And selecting my photo, I chose to convert my picture to black and white before printing it out as a 10 x 13 cm.

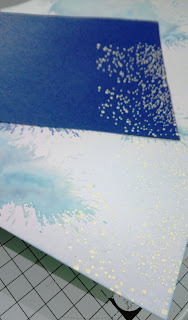
First up I inked up my POLY PLATE using tumbled glass, broken china and stormy sky Distress Inks, then spritzed the POLY PLATE and stamped it three times across the top of my page, inking up before each stamp.


 I popped my photo on to check the positioning of the next tree being careful as the stamped trees were wet and I didn't want to ruin my photo.


When I was sure where I was going to stamp my next tree I inked it up using broken china, blueprint sketch and faded jean, spritzed it and stamped it into place.


Using tumbled glass and broken china Distress Inks I lightly Distressed around the edges of the page.


I then inked up the swoosh in weathered wood sprtized it and stamped it under the dark tree, then without re inking I stamped parts of it under the two trees on the edges.


As the page needed to dry I went off in search of some complementary papers for matting my photo onto. On the darker one I stamped the falling snow across the top, in clear ink and embossed in our Vintage White Embossing Powder. I then repeated this across the top of my page.


Whilst my embossing things were out I stamped the "'Tis the Season" saying in clear ink onto a piece of  Vellum and tore around 3 edges.


I stamped the saying again this time in Stazon Blue Hawaii but only concentrating on the words Season and Magic. I then cut these out!


Once my embossed saying was cool I flipped it over and using the two smallest stars I stamped one in Stazon Blue Hawaii and the other in Cloudy Sky all of the reverse of the saying and left it to dry.


This time using all the stars and weather wood Distress Ink I stamped all over the paler piece of card that I would be using for matting my photo.


So, all my pieces were ready I decided to put my page together! I started by trimming down my matting papers, I cut the paler one 1cm larger than the photo and the darker snow one 2 cm larger than, as I wanted to see the snow! I popped my photo in place then attached my vellum saying, then the photo over the top. I then stuck the words Season and Magic in place.

Some was missing so I stamped the largest star in Cloudy Sky on top of the dark tree! PERFECT!


I really hope you enjoyed taking this step away from cards for a moment I sure did! And now I have found my 12 inch papers I might just have to start scrapping again!

Anyway Julys Monthly Make Set is available on our website now! With the stamps being available indivially from the 15th August! 

Sunday, 20 January 2013

Nina Crafts: Girly Gadgets and Posie Passion

Dimension Stamps launched a new range of stamps last Friday called Nina Crafts and I got to have a play with them!
This photo album/brag book is small and light weight so ideal for carrying around with you. It is designed so that the photos can be slipped in and out without the need for glue or brads, so no excuses for not having up to date photos to hand!


To make it I used the following stamp sets: Girly Gadgets (ref: NC001) and Posie Passion (ref: NC004) from Nina Crafts.

I started by cutting seven pieces of white card 5 inches by 7 inches (to hold 4x6 inch photos). Onto one I randomly stamped the large flower from Posie Passion all over. On the other six and on the back of three, I stamped two flowers on each towards the centre of the piece of card.

Next I made a mask by stamping the flower onto a sticky note and cutting out a petal (I needed a couple of these as when stamping the words the ink starting to come through.) Then in alternate petals I stamped "Pout" and "Smile" from the Girly Gadgets set on all of the stamped flowers.

On the piece of card I had stamped all over and one of the single sided other pieces of card, I masked of the flowers and distressed it to make the front and back pages. Onto each of these pieces I stuck a piece of grungeboard then onto that I stuck the other two single sided pieces.
Then I cut a small square of white card and stamped and embossed the camera onto, then masked it off and stamped the large flower again, adding the words as before. Next I stamped "Memories" in the corners. I then drew a black line around the edges and distressed up to it. I added a flower brad to each corner and attached it to the front of the album.


To make the inside pages I cut three pieces of light weight pink card 5 inches by 3 inches, scored at 1.5 inch. And cut two pieces 5 inches by 1.5 inches. Then in blue lightweight card I cut three pieces 5 inches by 2 inches, scored at 1 inch. And cut two pieces 5 inches by 1 inch.
Next onto the scored pieces of pink I stamped "Memories" on the two edges facing away from the fold at the top on one side and at the bottom on the other. On the other two pieces of pink I stamped "Memories" again facing out, once on each piece. I repeated this for the blue pieces but stamped "Memories" facing the fold line.
Once that was all done I took the front page and on the inside I stuck the unfolded blue piece to the outside edge with "Memories" at the bottom facing out. And the unfolded pink piece to the inside edge, so that the "Memories" was at the top facing out. When gluing the strips on only add glue to the two shortest sides and along the side that will be on the edge of the book. (this makes the pocket to put the photo into). This needs to be repeated for the back page too.
Then take one of the stamped white cards and on one end glue a blue strip and on the other a pink strip, for these I only glued along the two shortest sides. Then repeat this for the final two pages.
Finally stack it up so that all the pink edges are on one side and all the blue on the other, and bind it. I used a Cinch but book rings would work just as well.
It really is simple to do and you can add as many pages as you want!


Thursday, 29 November 2012

Picture Perfect!

Another two presents ticked off! No peaking Mrs (You know who you are!)


I have to admit I loved making these frames I got play with glue and inks, well you can only begin to imagine how messy it all got! But, well worth it in the end!

The film strip at the bottom of the picture is a fabulous ribbon from Tim Holtz that I stamped the year onto using Stazon ink.

I am really pleased with how the embellishment turned out for the top corner. Although I can't imagine it being that easy to dust!

Friday, 9 November 2012

Dimension Stamps: It's a date!

Dimension Stamps have a fabulous stamp set called It's a Date! (ref: 2400070a) it is meant to be used to make your own calenders, diaries, etc. I used it to create the calender parts in my journal.
 
However! You all know I like to be different and I thought it would be great to use on a scrapbook page to journal on...
 
"I Love Wellie Bobs"


I think it works well on this 12x12 page, I also cheated abit as I don't really like my handwriting, so were I could I used sentiments from Grand Word Perfect 2 (ref: 1803065a).

To date the page I also used a border from Grand Word Perfect and the dates from It's a Date!
 
The other stamps I used were Plain Uppercase Alphabet (ref: 1801012A) Plain Lowercase Alphabet (ref: 1801014A) and Sew Creative (ref: 2400073a).
 
I think works really well.
 
I also used it on this 8x8 page and it works just as well.
 
"Special Friend"

 
For this page I also used my Krystal tips (ref: 2400012A).


Saturday, 21 July 2012

Scrapbook - First Steps....

Last week I also completed two more scrapbook pages!


Of course there had to be ducks. We spent hours at the ducks walking (well she was walking we were bent over, holding onto her hands and shuffling along!). How fast time flies, now shes moved onto trikes and scooters....

Thursday, 5 July 2012

Dimension Stamps: Frosty’s Fashion Frenzy

Dimension Stamps launched Frosty’s Fashion Frenzy (Stamp ref: 2400067a) on Create and Craft last Wednesday 4th July and I was honoured to be asked if I would make some sample cards for the show. Well, true to form I didn't exactly do as I was asked......

Tree Ornament


The stamps just cried out tree ornament to me, and what a fantastic way to get the kids involved with those Christmas preparations.

All I did was stamp the snowman in one of the outfits, coloured him in and cut him out. In the lower section I cut out the middle leaving a thin border (enough to attach the photo!). I mounted him onto the photo then onto some navy card adding the ribbon as a hanger and cut around him leaving a small border.

Ribbon was added for the scarf along with a bucket full of stickles and of course no tree ornament snowman would be complete without googley eyes.

Little lady is going to be busy making these for Grandparents, I think!


Scrapbook Page

For this scrapbook page I stamped and dressed the snowman, coloured him in and cut him out. I then stamped the lamppost again coloured this and cut it out. For the lettering I used Plain Lowercase Alphabet (ref: 1801014a). I made them by stamping one letter and creating and mask for it before I stamped the next. To add the snowmen into each letter, I trimmed the mask of the letters each side of the letter I was working on and added the snowman image. It was quite time consuming and fiddly but well worth it in the end as it gave the page a sense of depth but it was actually as flat as a pancake, so perfect for adding to the album. I then coloured the lettering in, in alternate colours and added a bit of sparkle, I added shadow to the letters with a grey pen.

For the background of the photo's I just randomly stamped the snowman's clothes and coloured it all in and lightly distressed around the edge.

To make it up I chose a matching 12 x12 paper, matted up the photos onto the stamped background then onto two corresponding papers and placed this centrally on the paper. I then added the lamppost, snowman and lettering.

Christmas Count Down


I just couldn't resist having a play!  To make this "Christmas Countdowner" I cut an A4 piece of thick green card in half (A5) to create the back and I cut the other half into strips to make the frame, I matted these onto thicker strips of gold card. I then created the background (not that you can see it in the picture!) I tore a couple of post-it notes to make hills and using distress inks created a sky, I then used a mister to give it a molted effect. I left this to dry for a while. Next I stamped a Mrs Snowlady using as many bits as possible, theses were then coloured in cut out and assembled. Once the background was completely dry I stamped and coloured in the lamppost. I then positioned all the frame and the Snowlady to find out where I could stamp my words and leaves. For the words I used  Plain Alphabet with Words (stamp ref: 2400050a), and the Krystal Tips Upper and Lowercase Alpha (Stamp ref: 2400012a). These were then coloured in.

To finish off I covered the background with sticky backed plastic (you could also use acetate!), added the frame, Snowlady and brads. I then stuck all this to the backing cards. Added two eyelets and ribbon! The Snowlady was then glittered and glossed up!

To add the number of days just use a dry wipe pen!

I had soooo much fun using these stamps, I really recommend you check out the Dimension Stamps blog to see what ideas the very talented design team have come up with, as they actually have made some cards hehehe!


Monday, 4 June 2012

A perfect set of stamps

Word perfect is a stamp set recently released from Dimension Stamps, which I got a chance to play with (as I have a "acquaintance" on the design team! lol, she'll love being called that!) And here's how I got on....


This is just sooo simple to make the stem of the flower I curved "Thinking of You" "On Your Birthday" , the leaf was stamped using "Happy Birthday".  I then stamped "With Love" around the edge of the card. I distressed this, added gems, paper flowers, and a brad. (the butterfly was added later to hide an inky finger mark whoops!) it was when layered onto white card and the green ribbon added. It was then matted onto Green card and stuck to the card. Finally I added two beautiful corner embellishments from my stash!

So simple and so fresh!


When I saw the stamp set and all the "Family" related words where on it, it made me think of a very special lady who hasn't been very well recently, so I made her family tree. (One amazing lady!) The tree was made by stamping a flower stamp onto pages from an old book scrunching them, then distressing and covering them in crackle paint (I just love the stuff, I am going to be needing another pot soon!) the trunk was just a scrap of brown card cut to a trunk shape all framed in a narrow black frame. I finished it off with some ribbon, paper flowers and stamped Family onto a tag.

Now I want to make a scrapbook paper with pictures of everyone on it - another project to add to the "To do list......" hehehe.

Oh well, it wouldn't be me if I didn't do a scrapbook page and again these stamps were just the perfect addition to this 8x8 page.


Don't they grow up fast!

She is never that quiet these days, her favourite saying is "Cat did it! Naughty Cat!" ummm I don't think so, he isn't that talented!


Monday, 16 April 2012

Umm it's been a while...

whoops I haven't exactly been keeping you all up to date with my craftiness! So here goes...

My daughters scrapbook has progressed, another two pages are complete!


I am particularly pleased with the "distressed" flowers (or stressed flowers sounds better!) they are a flower stamp of Dimension Stamps and then instead of cutting them out I have torn them and screwed them up then inked them!

It gives quite a nice effect....

So off to my next project I have called it "Magnolia"

Sunday, 4 March 2012

Not much to report...

Ok so I am not exactly keeping up with my 2012 challenge in terms of updating my blog, but I am still crafting away merrily!!!!
I have made progress on my scrapbook another page done and dusted!


I am just so pleased with how it turned out, I really have been routing through my crafty stash and finding papers and bits I never knew I had! I think my best find is the "wooden" frame and the sign posts I have used. They are from the Pooh and Friends Cricut cartridge and it is just so nice! Also I have just discovered a big pack of kraft paper I must have bought at a show and it is so nice to work with it is ideal for the wooden grungy look - I think I will be using it alot more!!!!!!!


I have also been working on a picture for near the front door it will eventually say family but my desk is never tidy enough to cut the sheet of A1 card to form the back ground, but here's a sneaky peak at how that's looking.....


(yes that's knitted wire it looks fab and creates such an unusual texture that I can't wait to try it out on a card or two!!!!)

Well most letters are done..

Finally I went to the paper crafts show at Leigh over the weekend. WOW I have been quite a few times before but this one really did blow my socks off, it was idea central!

The first comment when I got home was "spent much?" (nope I could have spent a whole lot more!) closely followed with "where's all that gonna live?" he has a point! But little lady enjoyed emptying and refilling bags and seeing what she could play with! So it provided entertainment too!

Anyhow my best buy has to be  this 

I am not sure what you would call it but I can't wait to get started on it! It is fab, I have so many ideas how to decorate it!

Right mothers day around the corner along with my sisters and husbands birthday so onto those cards first then maybe onto the thing above, that's its name thingey!


Thursday, 23 February 2012

Scrapbook page

I have finally got around to doing some work on my daughters scrapbook, I am really bad it is only the second page I have done in it!

I do feel bad as for Christmas 2010 I made a scrapbook each for my mum, mother-in-law and sister, then for last Christmas they got a brag book each, so I really need to pull my finger out! 


Now onto the next page before I get distracted....