Sunday 31 July 2016

Rosie Doodles Day!

So, yesterday was Little Ladys' birthday she turned the grand old age of 6! Where has that time gone?

Time and time again she has proved what a determined and fearless Little Lady she really is, I have said it so many times before but what a difference a 6 months and the right school makes! 

This week she has been on yet another swimming crash course 30 minutes swimming every morning, but she was the only one on it!!! So she didn't have any breaks whilst the other children swam - she was tired, Mike worked her so hard, he was determined to get her some badges and so he pushed her every day but in true Little Lady style she just got on with it and, yes, she got a badge and is very close to another. She never complains (well not to her swimming teacher lol!) just jumps in and gives 110%.

Then on Friday, after swimming Little Lady had her 2nd casting audition for a dancing tv show. Was she tired? absolutely but that wasn't going to stop her. She had her job to do! She walked into a room of children she had never met before. I know that doesn't sound like a big deal but this is the little girl who 6 months ago if another child spoke to her she would have broken out in tears she was that scared of any child. But not now she wandered in and showed them her stuff! Does it matter if she doesn't get a part absolutely not! I couldn't be prouder, I saw dancing her socks off giving it 110% on Friday and more importantly enjoying herself!

So, yesterday we rested? I wish, we were up with the larks and riding our new bike (our neighbours must love us!) then rode it all day, round and round (we can only go anti-clockwise!) but we did it, even started using the brakes!!!!

Anyway, back to the reason you are all here. To continue the celebration of all things Little Lady, it felt only right to share a Rosie Doodles make and this canvas has to to be one of my favourites. 

To make it I used the Naturals Backgrounds, Rosie Says and of course Rosie Doodles.


To make this one I cover the bottom right corner in Texture Paste and stamped the open honeycomb into it.

Whilst that dried I stamped 4 solid roses (to get the water coloured effect I inked up the stamp and them spritzed it using water) and 7 leaves. When they were dry I over stamped them with the detailed stamp cut them out.

I inked up the canvas using different yellow/orange and pale brown inks. I then stamped the grain effect into the top left corner using Archival Ink. Around the edge I stuck the 1 inch wonder tape from be Creative and then covered it in their Wonder Crystals too.

Onto the canvas I then stuck the Roses.

To finish of the canvas I stamped one of the sayings, cut it out leaving a white border and then mounted it and cut that out too and added it to the canvas.

Thursday 28 July 2016

Ed's Plane - Kym

This one is by me!

For this one I used up some odd shaped MDF that has been on the "to bin" pile for a while! You know the pile that has everything you say you are never going to use but can't justify throwing away well these were on this pile! I also used Ed's Plane, Ed Says and Man-Made backgrounds.

So before we get the crafty bit, I have been asked a couple of times why Little Man got the cog designs ones? and why it's called Ed's Adventure? 

Well, he is my little fix it! If there is a screw or a bolt on something he has to investigate, how does it work? how can he take it apart? nothing is safe so the cog designs really do suit him. And as for the name well he is a wanderer, he can make an adventure out of a cardboard box, the smallest thing and he is off like a rocket to investigate! 

Anyway back to the craftiness...


So I started with 3 identical MDF plaques and cover them all in off white paint then added some brown paint whilst it was wet dragging it through the wet white paint and left it to dry. When they were dry I distressed the using Distress Inks and added lines of brown paint to give the effect of wood. 

Then I pushed them together so the long sides were touching but the tops were at different heights. I then stamped the cogs in the corners in brown. Next I stamped the plane a number of times over the three pieces and left to dry.

To create the saying I distressed a small piece of card added the cos the the corners and then stamped the saying and then matted and layered it.

When the MDF pieces were dry  I covered them in clear ink and added UTEE (Ultra Thick Embossing Enamel) and heat set it.

To finish it I cut a piece of mount board to go across the centre of all 3 MDF pieces leaving a small gap between each one and attached them. I added some ribbons and attached the saying.

Wednesday 27 July 2016

Ed's Balloon - Sue

First up is this beauty from Sue, Sue has just used Ed's Balloon and one of the sayings from the Ed Says set. I love the colours Sue has used but this card could be done in any colour palate.


To make this one Sue has started with an 8 inch card and chopped of some of the front. She has then cut some brown card to mount onto that and some cream a little smaller.

To create the background she has stamped the balloon randomly in the same colour ink as she used to distress the paper.

To create the balloon she has stamped the balloon in a permanent ink and then coloured it using Distress Ink


Thank You!

Wow, what a crazy week, this time last week I was sat worry about if anyone would like our new stamps set, would I mess up my demos or worse turn into a jibbering wreck! But apart from a couple of little glitches I don't think we did too bad. 

From all your feedback and comments I don't think I had anything to worry about, so Thank You! Will we be doing it again, give me a week to recover and ask again. And are we up to date order wise we are indeed, back to our usual 1 day turn around. And all of you lovely people who ordered our new stamps on pre-order well they should either already be with you or be very close, watch out for Mr Postie tomorrow!!!

As I have said so many times I have a fabulous Design Team in Sue, Nic and Jean! They really did do a stunning job making samples for the shows but don't worry I have lots of new things to keep them working on! So you haven't seen the last of them. 

What about samples, well it doesn't seem right to bung them all into one long post so I am going to sit and schedule a couple right now for the next couple of days and where I can I will give you a quick run down of how they are made. but in the mean time here is one of mine I made on the show....


Sunday 10 July 2016

July's Monthly Make - Christmas Edition

I am still pedaling!

We have had a fantastic week here at Crafty Roo HQ. I have chained Mr Roo to the stamp making machine (don't worry I do occasionally let him out for a quick cuppa every now and then!) so, he is busy making stamps for our shows on Hochanda on the 21st of this month! 

I have been busy playing sorry "making samples" and I have had a few samples back from my fantastic Designs Team and they are looking fabulous. I just can't wait to share, maybe we will have to have a few sneaky peeps next week!!!! 

As for the kids they are busy as usual Little Lady seems to be jumping from one activity to another, this weekend it has been play dates and dance auditions! And Little Man and I have been out exploring, thank god for waterproof pants! We were walking through some very tall grass and suddenly he shrunk but about a foot. it was just like that Vicar of Dibley moment...


And then it gets better, not only was he wet and muddy but he scared a frog which jumped off into the long grass which of course we must find - impossible yes especially with an overly excited (nearly) 2 year old running about!  

Ooh yes back to the reason I actually sat down to type, it was to talk about this months Monthly Make!

So, all of you lovely people that have subscribed to our Monthly Makes should have had yours through the door way before now, they were sent out last Monday so I hope you are all enjoying the fabulous set! And for those of you who aren't, don't panic it is now available on our website here.

And why is this Monthly Make just so fabulous, well.......


Tuesday 5 July 2016

June's Monthly Make creations

Wow, time is flying by! I am not complaining I just need to learn pedal a bit faster!


When it comes to the Monthly Makes I always imagine a bike race, say between London and Manchester, Sue has zipped off and is somewhere near Birmingham firing ideas out for the makes 2 or 3 months in advance and I am still trying to find where I left my bike!!!! 

Well someone has to keep me on track!

So, where were we JUNE that's right. Sue made some fabulous creations using June's Monthly Make and she is that good to us all she has even put the details on how she made them onto her blog. All you have to do is click on the link under each picture and you will be whisked away to Sue's blog and she will tell all....

And don't forget I have created a board on Pinterest just for our lovely Monthly Makes, there you will find all the creations in one place for every month - cool hey!   Monthly Make Pinterest Board.  (I am off to update it now!)


So if you would like to find out more about our Monthly Make then please visit our website.

Friday 1 July 2016

July's Monthly Make creations

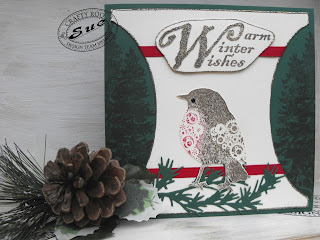
Wow I didn't realise I was so far behind! But here goes July's Monthly Make was our Christmas Edition! 

Yeh or Bah Humbug you decide.....

So every month Sue works her magic and creates lots of ideas using our Monthly Makes then goes even further and pops the instructions for them on her blog. All you have to do is click on the link under each picture and you will be whisked away to Sue's blog and she will tell all....


Square Reindeer (doesn't she give then nice names!


So if you would like to find out more about our Monthly Make then please visit our website.