Thursday, 27 March 2014

Busy days....

This week was always going to be busy as we have our very first show at Happy Stampers this weekend! I can't wait it was the very first show my mum, sister and I ever went too (many moons ago!), it is so exiciting going back as a trader and the bonus is its the closest show we will do to home so no silly get up times yyyaaaayyyy!

So, I can hear you all asking why it is such a busy week, well! I decided I wanted to make a few more "things" to show how fabulous our stamps are, well.... I might have got a little carried away!!!! 

Here's a quick look at some of them.....


 These last two were made by Sue aren't they cool!


I hope you like our stamps, if you do why not check out our website

Wednesday, 19 March 2014

Lady Lizzie

Many years ago I saw this torso and stand kit from Indigo Blu, but talked myself out of buying it as I didn't think I could do it justice! However, a couple of weeks ago I bought one (well two in fact but that's another post!), and this is how it turned out.....


I am just so pleased with how she turned out!!!!!

I hope you like our stamps, if you do why not check out our website

Stamps used for this card 


Sunday, 16 March 2014

A friend is......

I just love my quotes (if you hadn't guessed!) and this has to be one of my favourites.


This piece has been half made for ages as I just couldn't find anything to put in the centre, so it has sat lonely and unloved on my shelf, until now!

This wreath was so easy to make all I did was stamp the detailed Lizzie stamp onto different patterned paper, cut them out, scrunched them up and distressed them. I did the same with the leaf.

Next these were stuck onto a chipboard and a small pearl brad added to the centre of each flower. (Then I left it for a LONG time!).

Using a favourite quote I created a centre for the wreath. Around the edges of the quote I stamped Lizzie and distressed it, then attached it to the centre of the wreath.

Finally I attached some ribbon to the top of the wreath so I could hang it and a bow and some hat pins to the bottom.

I hope you like our stamps, if you do why not check out our website
Stamps used for this card 


Also here is the quote I used, if you are wanting to use it just right click and "Save image as"


Monday, 10 March 2014

At last......

I just had to share......

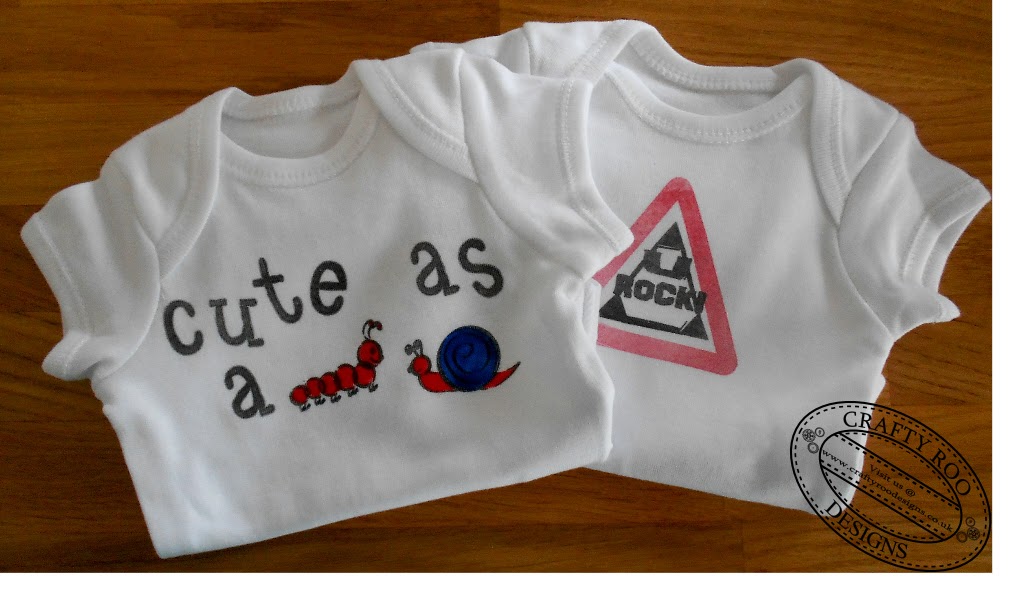
I have wanted, actually more like dreamt about these t-shirts for forever, so many people have said yep I can do them and let me down, apparently I would never find anyone who would be able to handle the detail of my logo!

Well I did! I found the fabulous David from Manchester Print & Promotions, he laughed when I mentioned the level of detail and he laughed even more at the prices I had been quoted! So in the quickest turn around ever he handed me these beauties.....


So this afternoon I am going to sit, stroke and admire these beauties - whoops I sound like I am turning into Gollum!

Thursday, 6 March 2014

World Book Day

Today is world book day, so it's yet another dress up day at school! Luckily we found out about dress up day way before the school holidays, so Little Lady has had plenty of time to perfect her outfit!

If you can't tell she wanted to be Goofy! And had Granny make/find everything even down to his white gloves.


Apparently these are some of Goofys best moves....


Tuesday, 4 March 2014

Spider-tastic day!

Here is a card made using our new little critter stamps, this one is called Sally Spider!

These stamp are great as you can make a card in minutes.....


For this card I started by stamping Sally three times onto an 5 inch square piece of white card, making sure they were stamped in the top two thirds of the piece of card, across the bottom of the card I stamped "Have a" and "Spider-tastic Day!". I added a straight line from each of the Sally's to the top of the card. Just above the text I added a ribbon and in the top two corners I added a brad.

Next I chose three different colours of pearlescent paper and onto each I stamped Sally. Out of the remaining paper I created a background, by adding a strip of each colour to a 6 inch square card. Onto that I attached the stamped image. 

Finally I cut out each of the coloured Sallys' bodies and attached them to the card and gave each one two googley eyes.

I hope you like these new stamps, if you do why not check out our website

Stamps used for this card

Sunday, 2 March 2014

Born to stand out!

I just love this little card, I made it whilst at Doncaster the other week.

I know the matting and layering is a little crooked and the wording could have done with being matted too but I like it and I am definitely going to play with this idea, so watch this space.......


I started by second generation stamping  Crafty Jack onto a piece of card 2cm smaller than A6 (I inked up Crafty Jack, stamped him onto some scrap paper then stamped him where I wanted him, it gives you a much softer image). next I coloured it in using watered down Distress Inks and a water brush. This was then mounted on to a piece of blue card and then again to an A6 card.

Next I stamped the solid Lizzie stamp onto some spare paper/card, then I added the detail stamp over the top and cut it out. Onto the card I position Lizzie (but didn't stick her down!) and stamped the stem and leaf. Then I stuck Lizzie down with foam tape and added a gem.

Finally, I cut out one of my favourite DR Seuss sayings "Why fit in when you were born to stand out?" and added it to the card.

I think you will be seeing this card a lot as I have a few birthdays coming up which it will be perfect for!

I hope you like these new stamps, if you do why not check out our website

Stamps used for this card