Monday 22 June 2015

Over the hill

It was a friends birthday recently and I couldn't resist using our Over the Hill saying.


To make this card I cut out a piece of card 1 cm smaller than A5, and attached some backing paper to the bottom half of it. On the top part I added sketch marks and distressed around the whole piece of card. Next I doodled a frame and coloured it in. Across the centre of the card I attached some ribbons and knotted them. this was then mounted onto a dark A5 card.

Next onto the same coloured card as the backing card, I stamped Jalopy and cut it out leaving about 1cm all around the image and added a frame as before. This image was then mounted onto darker card and attached centrally to the top of the card.

To finish of the card I stamped the Over the Hill saying trimmed it down and doodled around the saying. This was then mounted onto the darker card and trimmed down. Finally this was attached to the bottom of the card.

If you like our stamps, why not check out our website.

Wednesday 17 June 2015

Dad

Here is an other lovely Fathers Day Card or a Dad's Birthday card from Sue!

What a fabulous way of using our Leafy Doodles stamp set.


To make this card Sue has used the Leafy Doodles stamps set and Dad sentiment stamp

Monday 15 June 2015

Fathers Day Gift

This gift was really quick and simple to make and best of all, its up-cycled too!

In our house sticky notes are very rare but extremely valued! So what better gift than a sticky note holder!!! 


To make this gift I found an old CD case and measured the inside of the front and back of the case and took 1mm of the measurements. I then created my backing papers, for mine I used Distress Strains and Inks, but it would look fabulous made using a picture the kids had painted too! I then cut it to fit in side the case. I chose a picture of the kids, its an old one but one of the very few where one of them isn't pulling a funny face! Trimmed it down and cut a mount for it. 

Next I inked up a piece of off white card using Bronze Distress Stain and left it to dry. When it was dry I stamped A Sons First Hero and A Daughters First Love and cut them out.

To make the CD into a stand I first removed the front cover, turned it and re-attached it, the front will then stand quite nicely (if it doesn't a small blob of glue will fix it into place. Onto the backing paper I doodled around the edge and attached the photo and then slipped this into the case and the cut out sayings attached the the CD case.

For the base I doodled around the edge and stamped Dad across the top of the piece of backing paper. I then covered this in sticking back plastic so that when the sticky note run out they can be removed without damaging the paper. This was then placed into the back of the CD and the sticky notes attached to it.


If you like our stamps, why not check out our website.

Friday 12 June 2015

First Love.....

So mum popped around to watch Little Man whilst I went for a VERY overdue haircut and she brought some lovely samples along with her. This one I just had to share straight away.....


To make this card Sue has used the Dad - Daughter sentiment and Fairy Wings. I just love the background she has created!

If you like our stamps, why not check out our website.

Wednesday 10 June 2015

1st Fathers Day

Here is another card made using our Tall Dad sentiment stamp, this one makes a fabulous 1st Fathers day card or a card for a new dad!


To make this card I stamped the Tall Dad sentiment onto some white card and trimmed it down. I then doodled around the edge of the image and crossed out the "you" and wrote I.

I then found some backing paper and mounted this onto a matching backing card and then onto an 8 x 8 inch base card. I also cut a strip from the two matching cards and stuck those across the card about 1.5 inches up from the bottom of the card.

Next I mounted the sentiment onto the matching coloured cards and trimmed them down leaving a small border on each. This was then attached to the card using foam pads.

To finish of the card I added a Sizzix die cut animal (with a googley eye of course!), some buttons and string, then finally added some glitter glue to highlight "DAD".

If you like our stamps, why not check out our website.

Tuesday 9 June 2015

Father's Day

So with Father's day just around the corner I thought I would share a couple of ideas!

This first card is so quick and easy to do but I think it looks great too!


To make this card was cut a piece of off white card 2cm smaller than A5. I tore a piece of scrap paper to create a landscape and using distress inks, inked the bottom green. And on the top I tried to create a sun set. I doodled around the edge and then mounted it onto green card and attached some string and then attached it to a brown base card.

Next I stamped the Tall Dad and one of the trees from the Lots of Trees stamp set and trimmed it down so it was 2cm bigger than the stamped image. I then lay this on top of the background piece and matched up the hills. I removed the background and inked up the hills. doodled around the edge and mounted onto a piece of green card. This was then attached to the front of the card using foam pads.

I think this one would make a lovely scrapbook page or canvas too!

Wednesday 3 June 2015

A pot full of daisies

I love flowers but this year my garden is more veggies and fruit than flowers, as I just haven't gotten around to sorting out the bedding plants yet. Little man doesn't seem that keen on gardening as he spends most of the time pulling up any plants I have just planted! So this year veggies will have to do and hopefully next year he will understand not all plants want pulling out the ground and eating!

I just love how this card turned out and, I really enjoyed making it - stamping, painting and distress inks what could be more relaxing??????


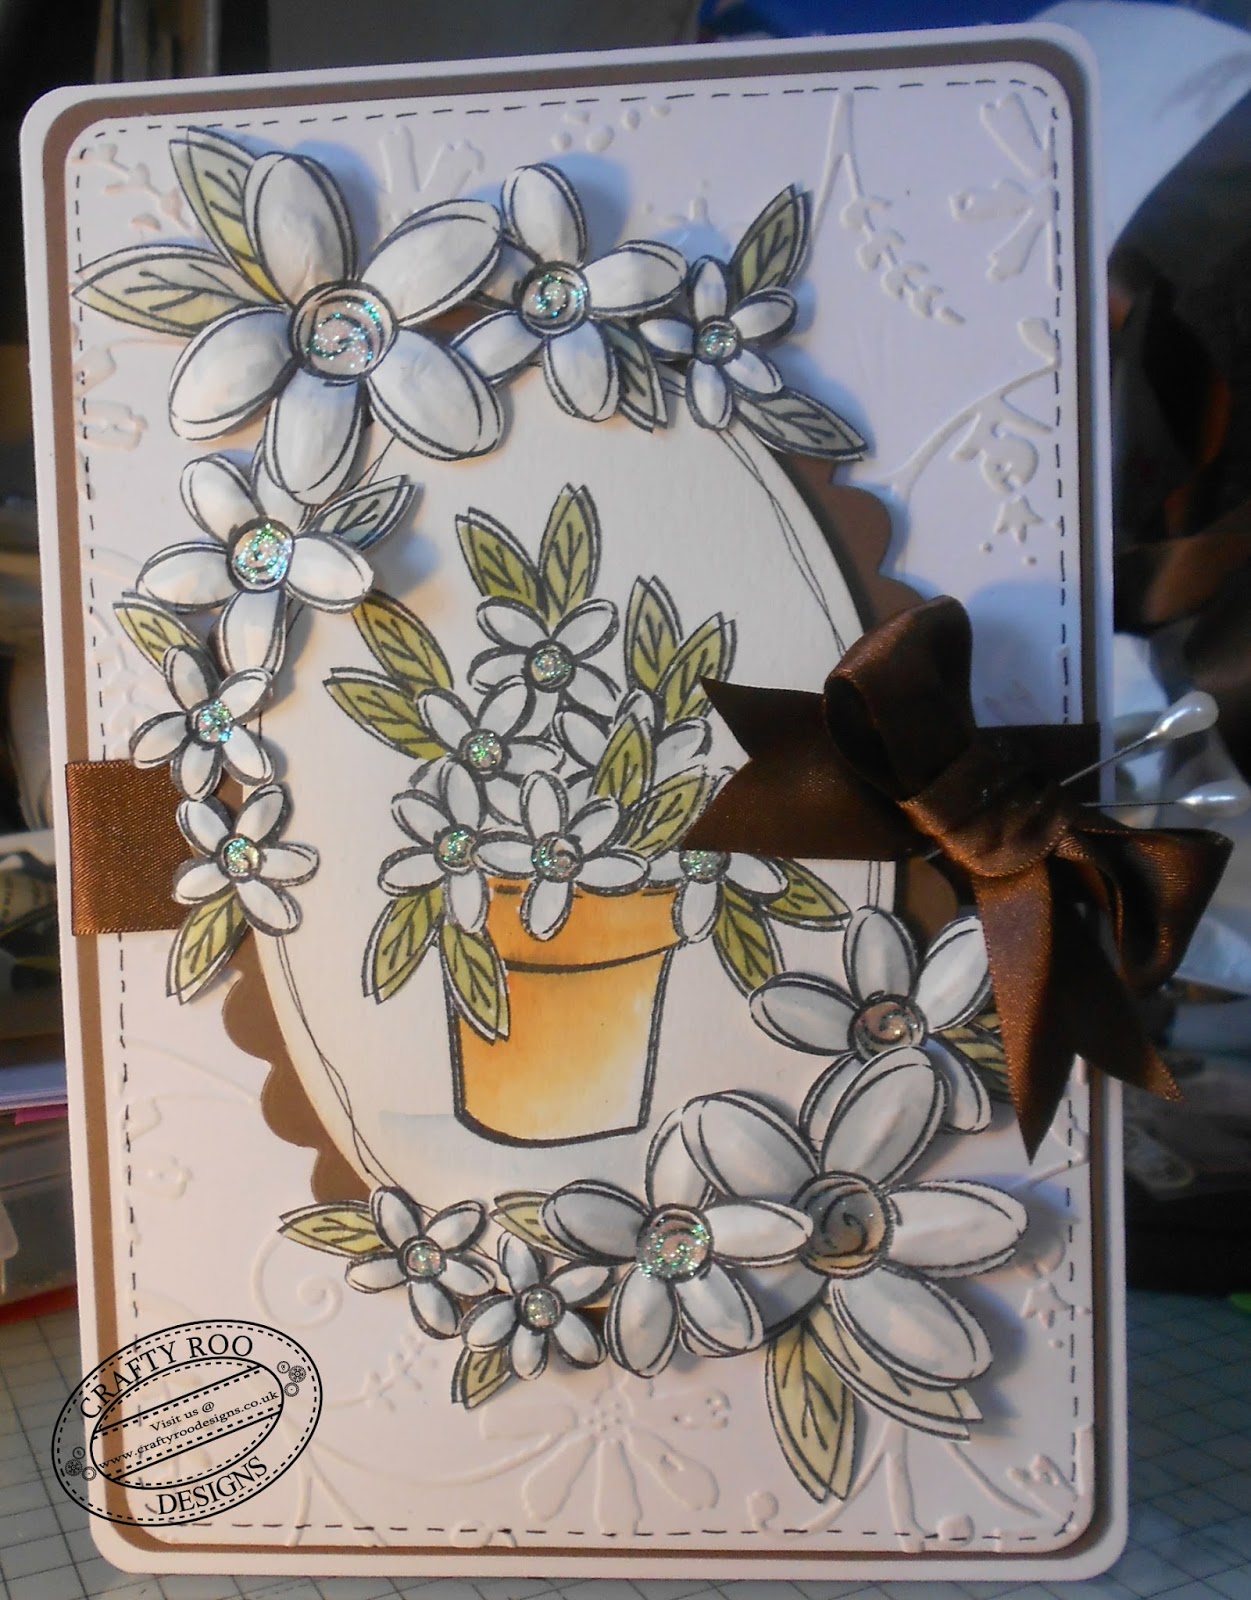
To make this card I started by die cutting a large oval out of cream card and stamped the small daisy in the centre and masked it off and repeated until I had a triangle of daisies and then I stamped the largest pot from the Lots of Pots stamp set. I then coloured them in using Distress Inks and a water brush. I then distressed around the edge and added two doodle lines.

Onto another piece of cream card I stamped 2 of the largest, 4 of the middle sized and 5 of the smallest Daisy flowers. And then 4 of the larger leaf and 10 of the smallest ones. These to were coloured in using Distress Inks, cut out and shaped using an embossing tool.

I used an A5 off white card for the base card and rounded off the corners. Next I cut a piece of brown card 1cm smaller on both sides and a off white piece of card another 1cm  smaller then the brown. The off white piece I then embossed, lightly distressed, added faux stitching around the edge and mounted it onto the piece of brown card. Across the centre I added a piece of brown ribbon and attached it to the base card.

In the centre of the card I attached the oval which I had mounted onto a larger scalloped oval. Around that I arranged and attached the cut out daisies and leaves.

To finish of the card I added stickles to the centre of the flowers and a bow and hat pins to the ribbon.

If you like our stamps, why not check out our website.