Showing posts with label Sentiments. Show all posts

Friday, 28 June 2019

TEXTURE - Live your life...

Well, this month hasn't quite gone to plan, but I am back and I hope I can squeeze a couple more TEXTURE Tags in before the end of the month.

This one feels perfect for today a beautiful bright summery tag


For this one I started with a Kraft Tag and a selection of Distress Oxides


And colour the tag, a third in each colour


Then using the Splat stamp, spritz the stamp with water then stamp onto the tag and remove the excess water with kitchen roll, to create a faux bleaching effect. Do this randomly over the tag.


Making sure the stamp is dry ink it up in the palest colour and stamp it again randomly over the tag.


Then repeat this with the other two colours until you are happy with the tag.


Onto some spare white card I stamped a number of the Solid mini funky Flowers Foliage and Violet stamps, using Distress Oxides.


I then stamped the outlines in a deeper Versafine colour.


I then cut these out.

Next I stamped "Live your Life" stamp in Versafine Black in and trimmed a piece of white card to fit.


 I cut a piece of black card just slightly bigger than the sentiment then arranged the sentiment and flowers onto my tag.

I though the tag looked a little odd so added a couple of the small sketch lines to balance it, I stamped these in Vintage Sepia Versafine.


I then stuck everything down and chose a ribbon, I chose a yellow organza ribbon and distressed it using some Distress Oxides. And finally I added a couple of pearls to the centre of the flowers.


Tuesday, 18 August 2015

Deck the Halls

This set (Deck the Halls - Set 2) proved to be a big hit at Ross Papercrafts show up in Nissan last Sunday, people couldn't believe how quickly you can make a fab card.

So here goes this beauty can be made in a matter of minutes.....


I started by cutting up all my card first so in red I cut a 13.5cm by 20cm  and a 12.5cm by 3cm. In white I cut a 12.5cm by 19cm and a 12.5cm by 2.5cm.

That all done I distressed lightly around the edge of the white cut pieces using Scattered Straw (this helps to make the red look red"er"). Across the top of the large white piece of card I stamped Sparkle Flourish in Memento Ladybug and then the four baubles (Christmas Minis Set 2). I then doodled around the edge and added the string between the flourish and each bauble.

Onto the thin strip of white card I stamped Deck the Halls doodled around the edge, mounted this onto the red and added a gold brad to each corner. This was then attached to the large piece of white card, and again this was mounted onto the red card, brads added and then attached to the front of a white A5 card.

So that was quick wasn't it!

These stamps can be bought as a set or individually so, if you like this set or would like to check out more of our stamps then hop over to our website!

Tuesday, 14 July 2015

One for the boys

This one looks a bit like I feel this week! 

Little man has found his feet, he has been toddling around for a good month or so but this week his confidence has grown and he is like Usain Bolt. One rustle of a bag or the creak of a door opening and he is off to investigate at a 100mph! So, needless to say after my millionth dash from one end of the house to the to other I am feeling a tad "vintage".

This card was really fun and best of all I got to sit down...


For this one I started by staining an A4 piece of card using Tea Dye Distress stain. Whilst that was drying I cut a 7.5 inch square piece of card and stamped Happy Birthday all over it, using the 1st and 2nd generation images to add more texture. I then distressed it, added sketch marks, mounted it onto a brown card, added a brad to each corner, tied some string around it, then mounted it onto an 8 in square base card.

When the stained card was dry (I cheated and used a heat gun to speed it up) I stamped Crafty Jack in one corner and Jalopy in the other I trimmed these down. Onto a spare piece of the card I stamped Happy Birthday and trimmed this down too. I then added some colour to Crafty Jack using distress inks and distressed all the three stamped images adding sketch marks. These were then mounted onto brown and black card as before. I then attached Crafty Jack to the card. Onto the three stamped images I added crackle glaze and left to dry.

When everything was dry I punched a small hole in each corner of Jalopy and Happy Birthday, added brads and attached them to the card.

This one was so much fun to make and I remembered how much fun Crackle Glaze can be!!!!!!!!!

If you like our stamps, why not check out our website.

Tuesday, 7 July 2015

Lilly anyone???

A while ago we released the lovely Lilly Doodles but with one thing and another I hadn't got to play, so I made some time!!

This card was sooo simple to make - I know I say that a lot but it really was it took me longer to choose the colours then make the card! 

But I love it it feels really fresh and could be used for any occasion!


How to make
  • Onto some pale pink card I stamped Lilly 6 times and stamped the centre onto 3 of those. Then using some Seedless Preserve Distress Ink I dragged the colour from the centre of the flower, making sure the centres stayed darker than the edges. I then cut these out, 3 whole and then the other 3 I just cut out the 3 front petals.
  • Next out of off white card I cut a 5.5 inch square piece of card and a 5.5in by 1.25 in. These were both distressed and sketch marks added.
  • Onto the strip of card "Birthday" was stamped and then "lots of" and Love" from the Extra Words stamp set was added to create the sentiment. This was then matted onto a piece of brown card, doodle lines added around the sides.
  • The 5.5 inch square piece of card was attached to brown card and doodle lines added around the edge of the card. The strip of card was then attached to the square piece of card up from the bottom. Into each of the corners and the corners of the sentiment I added a brad. this was then attached to a 6 inch square card.
  • Finally I attached the Lillies using foam pads. adding the whole Lilly first then the one with 3 petals. to the centres I added some stickles.


Monday, 22 June 2015

Over the hill

It was a friends birthday recently and I couldn't resist using our Over the Hill saying.


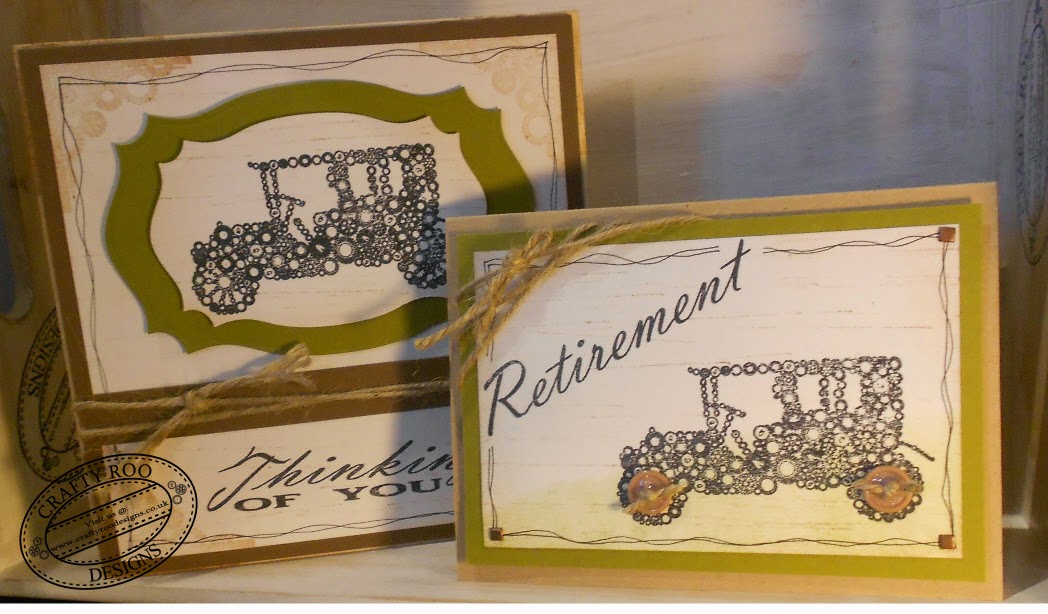
To make this card I cut out a piece of card 1 cm smaller than A5, and attached some backing paper to the bottom half of it. On the top part I added sketch marks and distressed around the whole piece of card. Next I doodled a frame and coloured it in. Across the centre of the card I attached some ribbons and knotted them. this was then mounted onto a dark A5 card.

Next onto the same coloured card as the backing card, I stamped Jalopy and cut it out leaving about 1cm all around the image and added a frame as before. This image was then mounted onto darker card and attached centrally to the top of the card.

To finish of the card I stamped the Over the Hill saying trimmed it down and doodled around the saying. This was then mounted onto the darker card and trimmed down. Finally this was attached to the bottom of the card.

If you like our stamps, why not check out our website.

Wednesday, 17 June 2015

Dad

Here is an other lovely Fathers Day Card or a Dad's Birthday card from Sue!

What a fabulous way of using our Leafy Doodles stamp set.


To make this card Sue has used the Leafy Doodles stamps set and Dad sentiment stamp

Monday, 15 June 2015

Fathers Day Gift

This gift was really quick and simple to make and best of all, its up-cycled too!

In our house sticky notes are very rare but extremely valued! So what better gift than a sticky note holder!!! 


To make this gift I found an old CD case and measured the inside of the front and back of the case and took 1mm of the measurements. I then created my backing papers, for mine I used Distress Strains and Inks, but it would look fabulous made using a picture the kids had painted too! I then cut it to fit in side the case. I chose a picture of the kids, its an old one but one of the very few where one of them isn't pulling a funny face! Trimmed it down and cut a mount for it. 

Next I inked up a piece of off white card using Bronze Distress Stain and left it to dry. When it was dry I stamped A Sons First Hero and A Daughters First Love and cut them out.

To make the CD into a stand I first removed the front cover, turned it and re-attached it, the front will then stand quite nicely (if it doesn't a small blob of glue will fix it into place. Onto the backing paper I doodled around the edge and attached the photo and then slipped this into the case and the cut out sayings attached the the CD case.

For the base I doodled around the edge and stamped Dad across the top of the piece of backing paper. I then covered this in sticking back plastic so that when the sticky note run out they can be removed without damaging the paper. This was then placed into the back of the CD and the sticky notes attached to it.


If you like our stamps, why not check out our website.

Tuesday, 17 February 2015

Buttons and bits

Well the school holidays are well underway at Crafty Roo HQ and so far Little Lady has gone through more tubes of glue and more rolls of tape than I care to think about! But a few buttons managed to escape the sticky mess and got turned into this little beauty.


To make this card I stamped our new Button Mum saying onto a piece of handmade paper and tore around the edges.

I then cut a 5.5inch square piece of white card and distressed around the edge, onto it, in the two opposite corners I attached two 10cm squares of handmade paper.  Around the edges of the white card and the handmade papers I doodled some stitches. Around the left hand side I attached some ribbon and lace. This was then attached to a 6 inch square kraft card.

The sentiment was added to  the centre of the card and buttons attached around the card to finish off.

I hope you like our stamps, if you do why not check out our website.

Wednesday, 11 February 2015

Spring???

After the arctic conditions on this mornings school run I thought I would cheer myself up with a bunch of tulips.


This card can be adapted for any occasion. 

I started by cutting a piece of pink and a piece of white card 5.5 inch square. Across the bottom of the pink card stamp your sentiment, place the white card over the top of the pink one and mark on the white card there the sentiment begins. Now tear across the white card, so that when it is on the top of the pink card you can see the sentiment and there is a slight border. Next stamp the tulips all over it , distress around it and attach it to the pink card. Doodle around the three un torn edges of the white card, attach some ribbon across the center of the card and attach it to a 6 inch square Kraft card.

Onto a small piece of white card stamp the tulip 3 times, colour them in doodle around the edge and amount onto pink card. Attach this onto the base card.

Finally Add two card candis to the top corners of the white card and a clear gem on each corner around the tulips.

I hope you like our stamps, if you do why not check out our website

Monday, 9 February 2015

OH NO!!!!!!!

So, what do you do if you drop a Jelly Baby or two????? 

Make a card of course......


To make this card I dusted off the Jelly Babies with a paint brush and covered them in a Sealer and left them to dry. 

I then cut a piece of white card 5inch square and about a thrid of the way up the card I stamped "You're so sweet" and the hearts and kisses from our new Valentines Greetings stamp set, coloured in the hearts and doodled around the edge. This was then mounted onto a piece of yellow card, brads were added to each corner and this was then mounted onto a 6 inch square card.

Next I cut a small piece of white card big enough for the three fella to fit on and a larger piece in yellow. I doodled around the edge of the white piece of card and mounted this onto the yellow, added brads and attached this to the card.

To finish of the card I attached the three fellas and added glossy accents to the hearts.

I can't stress this enough DO NOT EAT THE SWEETS!!!!!!!!  But how cool hey!

Saturday, 7 February 2015

Mothers Day.

I know its a while away but I was given some handmade papers and all I could think was how gorgeous they would look with Daisy Doodles so here they are, beautiful hey!


To make this one I stamped detailed Daisy onto the handmade paper 6 times and the detailed leaf 8 times and cut them out.

Onto a cream piece of card I stamped Mother into the centre and distressed around the edge using purple ink. Next I wet a piece of kitchen towel and stamped the solid Daisy stamp onto it then onto the card to remove the ink from the card. when it was dry I then 2nd generation stamped the detailed Daisy stamp in purple ink. This was then mounted onto a pale purple card and then onto a dark purple base card.

I two opposite corners I added a metal emblishment and across the bottom I added some cream ribbon. In the top left hand corner I arrange the cut out flowers and attached them to the card. Finally I added some Stickles to the flowers.

I can believe how quick and easy this card was and also howmuch i love those handmade papers!!!!!

I hope you like our stamps, if you do why not check out our website

Thursday, 5 February 2015

Happy New Year!

Wow, I hope you are sitting down!

Yes I  am finally getting around to sharing some ideas! So here goes.....

As some of you are aware we have been asked to run a few workshops of the fantastic Ross Papercrafts Shows, the next one is being held in Doncaster on the 14th of February at 
Balby Carr Community Academy,
Weston Road,
Balby,
Doncaster,
DN4 8ND


So, for the Doncaster workshops we have decided on a bloke theme, in the morning workshop we will be making two cards.


And in the afternoon we will be playing with inks and glue to make drinks mats (Cup not included!)


So if you are nearby or fancy a day out why not check out a fabulous show and maybe even join in one of our workshops, it would be great if you could join us!!!!!!!!!!!

If you have any questions about our workshops or have any questions please drop us an email kym@craftyroodesigns.co.uk we would love to hear from you!